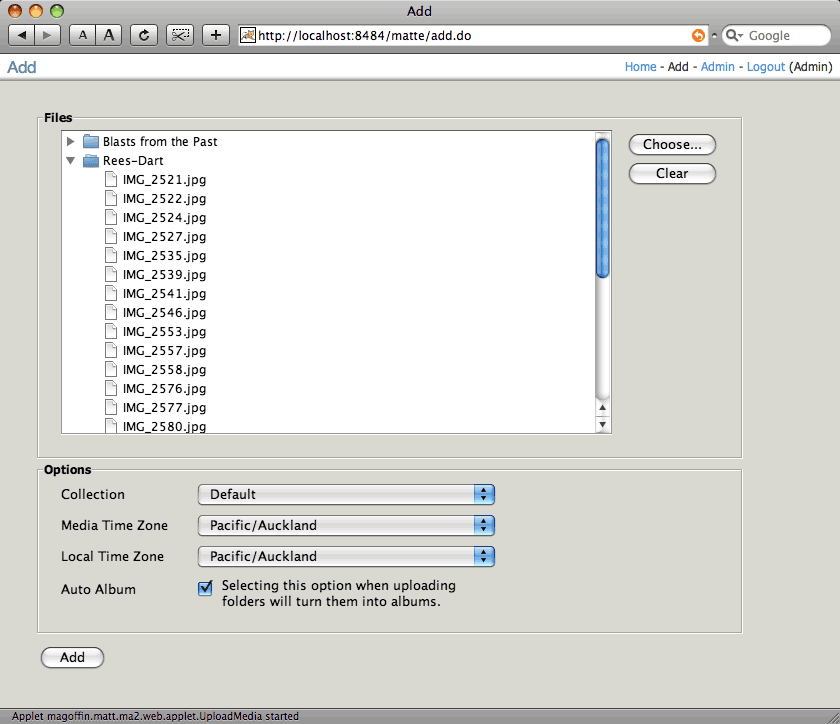
The Matte Add Files applet.
This guide describes how to deploy the Matte Add Files Java applet to your existing Matte application. The Add Files applet provides an easier way for users to upload files, without the need of manually creating zip archives to upload multiple files at once.
You must have successfully deployed Matte before continuing with this guide. See the Installation Guide for help deploying Matte for the first time.
Download the Matte Add Files applet from SourceForge.
Since the applet must be allowed to access the user's file system, it must be digitally signed. Otherwise
the browser will not allow the applet to access any files. In the Add Files archive you just downloaded
you'll find a matte-upload-applet.jar file. This is the applet code that needs to be signed.
The actual steps requried for signing are outside the scope of this guide. The most common method of
signing the JAR file is to use the jarsigner application that ships with the Sun Java JDK.
Sun has ample
information available about the Java security tools, and about
signing JARs more
specifically.
The Matte webapp contains a folder named applet. If you have expanded the Matte WAR file,
copy the signed matte-upload-applet.jar file into this folder. Otherwise, un-jar (or un-zip)
the Matte WAR file, copy the signed mappe-upload-applet.jar into the applet folder, and
re-jar (or re-zip) the WAR.
To enable the applet to be used, use the Matte Setup Wizard to turn on this feature. Or you can manually
modify the WEB-INF/classes/env.properties file in the Matte WAR by changing the
feature.upload.applet peroperty to true.
After making these changes, you'll have to restart Matte for them to take effect.